How to measure your benchtop & splashback
How to Measure Your Benchtop & Splashback for an Estimate
Don't worry — it doesn't need to be perfect.
For an initial estimate, we only need some photos and rough measurements of your existing kitchen.
Your measurements are not used to manufacture your new benchtop. Final dimensions are confirmed by us or our stonemason before manufacture.
You'll need
- Tape measure
- Your phone
- About 5–10 minutes
- 1Take a few photos
- 2Measure each benchtop run
- 3Measure the splashback if applicable
- 4Send everything through
Your measurements don't need to be perfect
We use these measurements to understand the approximate size and layout of your project and prepare an initial estimate. Your new benchtop will not be manufactured from these rough measurements.
Your rough measurements
= Initial estimate
Confirmed final dimensions
= Manufacture
First — take a few photos
Photos often tell us just as much as the measurements. Stand back and take a few clear photos showing:
- The whole kitchen
- The benchtop from one direction
- The benchtop from the opposite direction
- Sink area
- Cooktop area
- Splashback
- Any unusual corners, joins or features
If there is an island, breakfast bar or separate benchtop, photograph that too.
Tip: Don't worry about making the kitchen look perfect. We're looking at the layout and existing benchtop — not judging the dishes on the bench.
Measure each benchtop run
Measure in millimetres where possible. For each benchtop section we mainly need two numbers:
- Length — how long the benchtop runs along the wall or cabinetry.
- Depth — approximately from the wall (back edge) to the front edge of the benchtop.
- For an island: length × width.
You don't need to calculate square metres, slab sizes, joins, cut-outs, overhangs or mitres. We only need enough to estimate. The diagrams below use the same layouts as our Benchtop Planner — the sizes are examples only, not standard dimensions.
Straight benchtop
Measure the overall length along the wall, and the approximate depth from the wall to the front edge. That's enough for an initial estimate.
Length: 3000 mm (example)
Depth: 600 mm (example)
L-shaped benchtop
Measure the approximate length of each run — the main run and the return — each from its outside end to the corner, plus the approximate depth of each. You don't need to work out the inside corner; we take care of that.
Main run length: 3000 mm (example)
Return length: 2200 mm (example)
Main depth: 600 mm (example)
Return depth: 600 mm (example)
U-shaped benchtop
Measure each main run separately — back, left and right — plus their approximate depths. No need to calculate square metres or work out the joins. We assess that.
Back run length: 3000 mm (example)
Left run length: 2000 mm (example)
Right run length: 2000 mm (example)
Back depth: 600 mm (example)
Left depth: 600 mm (example)
Right depth: 600 mm (example)
Galley kitchen
A galley has two separate benchtop runs facing each other, roughly parallel, with a walkway between. Measure the length and depth of Run A and Run B.
Run A — length: 3000 mm (example)
Run A — depth: 600 mm (example)
Run B — length: 2600 mm (example)
Run B — depth: 600 mm (example)
Island
Measure the island's length × width. If it's an unusual shape, take a photo and give us the approximate overall dimensions.
Length: 2400 mm (example)
Width (depth): 1000 mm (example)
L-shape + island
Measure the L-shaped kitchen as above (main run, return and depth), then the island's length and width. Keep it simple.
L-shape — main run length: 3000 mm (example)
L-shape — return length: 2000 mm (example)
L-shape — main depth: 600 mm (example)
L-shape — return depth: 600 mm (example)
Island — length: 2000 mm (example)
Island — depth: 900 mm (example)
Two separate benchtops
Two independent benchtops that aren't connected and don't need to face each other — for example a main bench and a separate bench on another wall or a butler's pantry. Measure the length and depth of Benchtop 1 and Benchtop 2 on their own.
Benchtop 1 — length: 3000 mm (example)
Benchtop 1 — depth: 600 mm (example)
Benchtop 2 — length: 2200 mm (example)
Benchtop 2 — depth: 650 mm (example)
Mark your sink
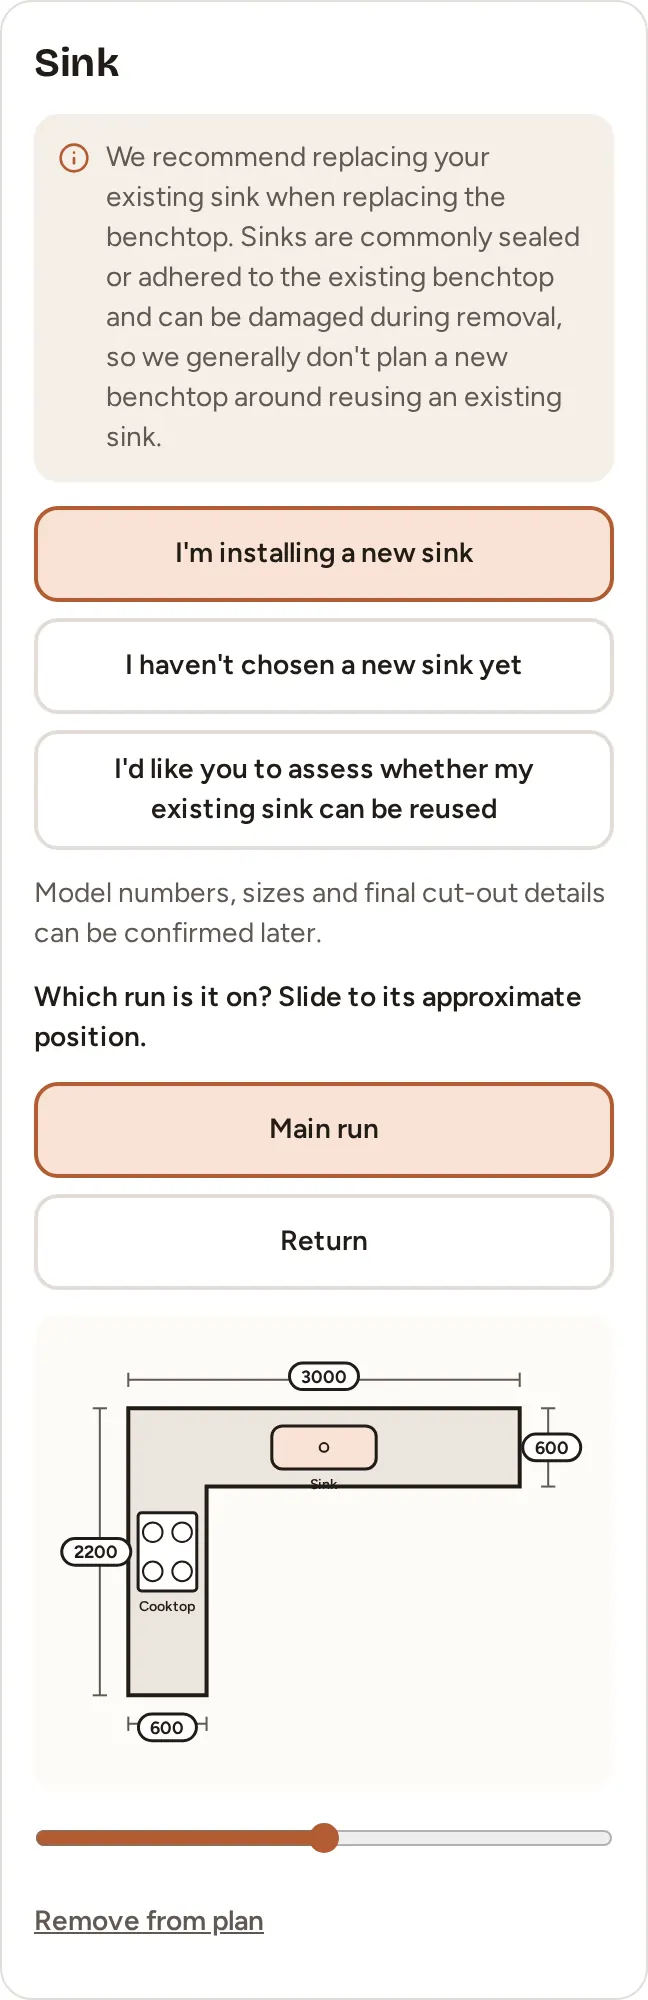
We don't need an exact cut-out measurement for your initial estimate. Simply tell us approximately where the sink is. On a sketch, write SINK roughly where it sits; in the Planner, choose the run it's on and slide it into position.
If possible, include a clear photo of the existing sink area. There's no need to remove or disturb the sink.
Mark your cooktop
Same idea — no need to measure the cooktop cut-out for the initial estimate. Just:
- mark approximately where it sits;
- tell us which benchtop run it's on;
- take a clear photo.
If you already know your replacement cooktop, you can give us the details later. Final cooktop details must be confirmed before manufacture where a cut-out is required.
Main run length: 3000 mm (example)
Return length: 2200 mm (example)
Main depth: 600 mm (example)
Return depth: 600 mm (example)
Example: sink on the main run, cooktop on the return — approximate positions are all we need.
How to measure your splashback
For each splashback section, measure approximately width × height.
- Width — along the wall, from one end of the section to the other.
- Height — under overhead cabinets, from the top of the benchtop to the underside of the overhead cabinet. For a full-height section, measure the approximate total height.
Example only — Section A: 2400 mm wide × 600 mm high. Section B: 1800 mm wide × 600 mm high.
Splashback around windows, rangehoods, unusual corners, nib walls or different heights? Don't stress about creating a perfect drawing. Take a clear photo and give us the approximate overall dimensions.
Prefer pen and paper?
A rough sketch is completely fine.
- Draw the approximate shape from above.
- Write the length beside each run.
- Add the approximate depth.
- Write SINK and COOKTOP where they sit.
- Take a photo of your sketch.
- Upload it with your photos when you start your estimate.
Or use our Benchtop Planner
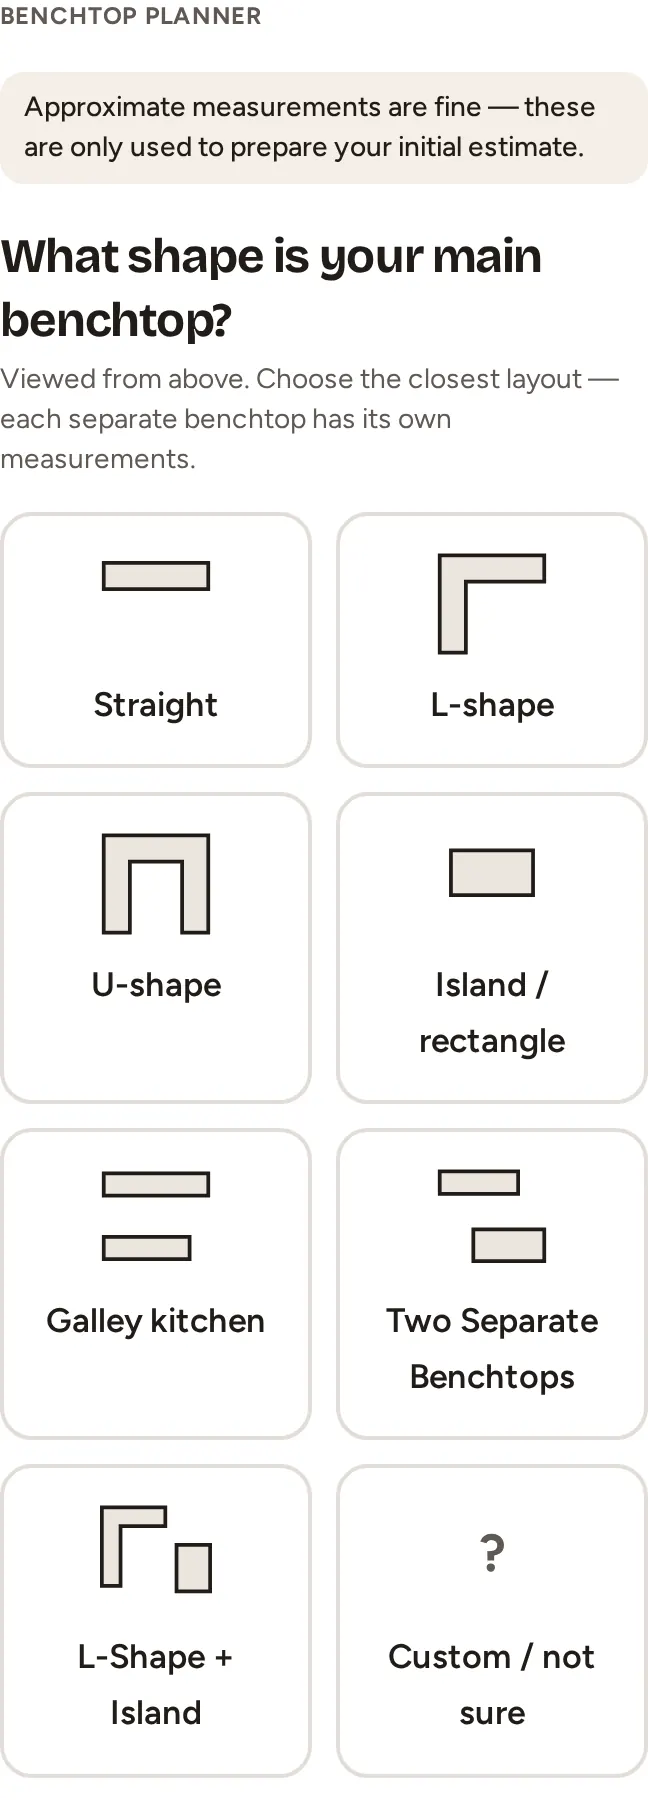
If you'd rather not draw it yourself, our online Benchtop Planner walks you through the layout. It supports straight, L-shape, U-shape, galley, island, L-shape + island and two separate benchtops.
Step 1
Choose your kitchen layout
Pick the shape closest to your kitchen, viewed from above. Each separate benchtop has its own measurements.
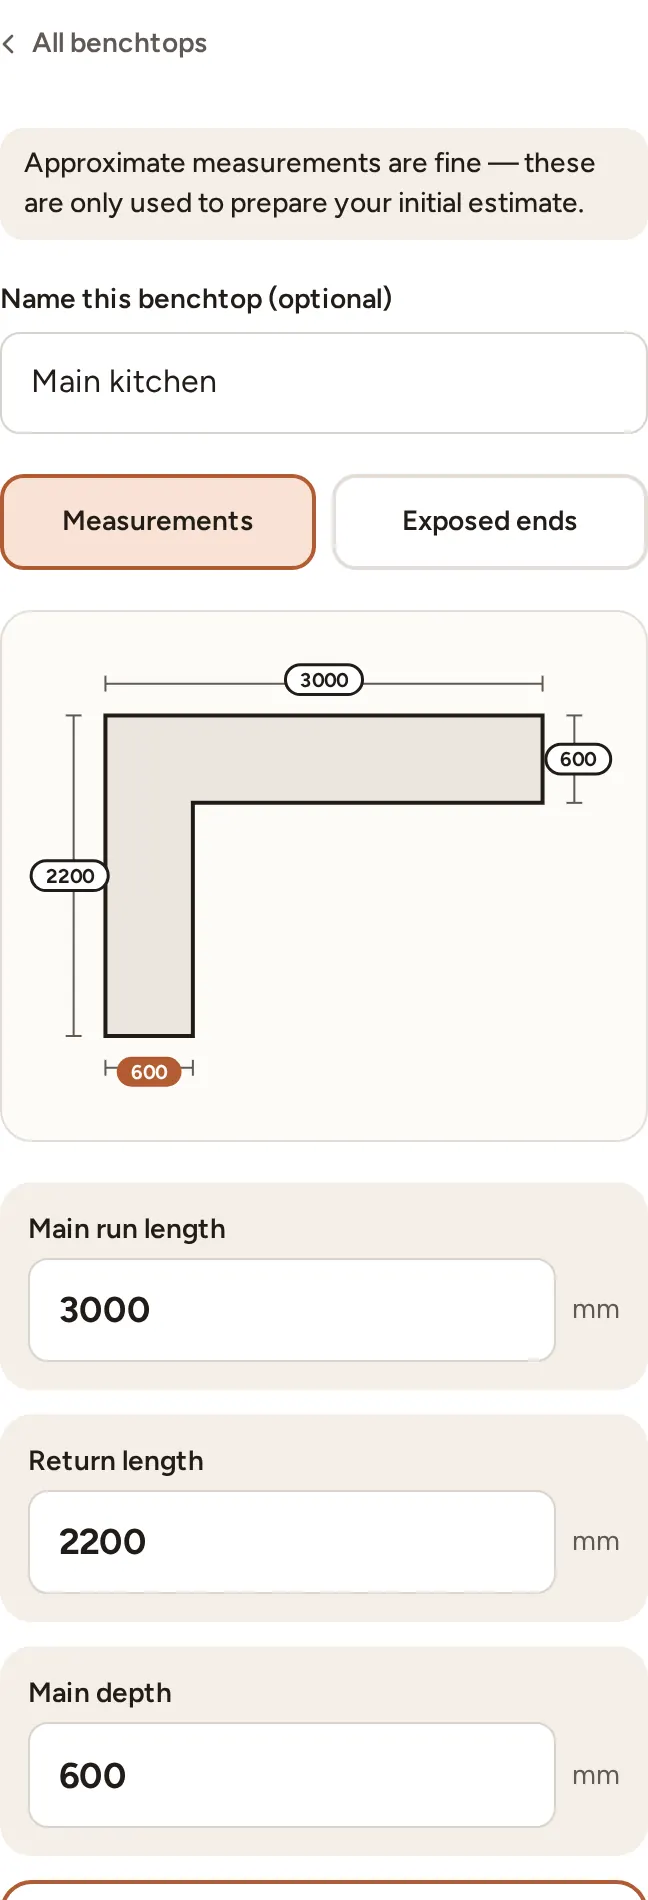
Step 2
Enter your rough measurements
Type each length and depth in millimetres. The drawing updates as you go so you can see which measurement is which.
Step 3
Add your sink and cooktop
Tell us if you're installing a new sink or cooktop, choose which run it's on and slide it to its approximate position.
Step 4
Review your preliminary measure
Check your plan, edit anything you like, then continue with your estimate.
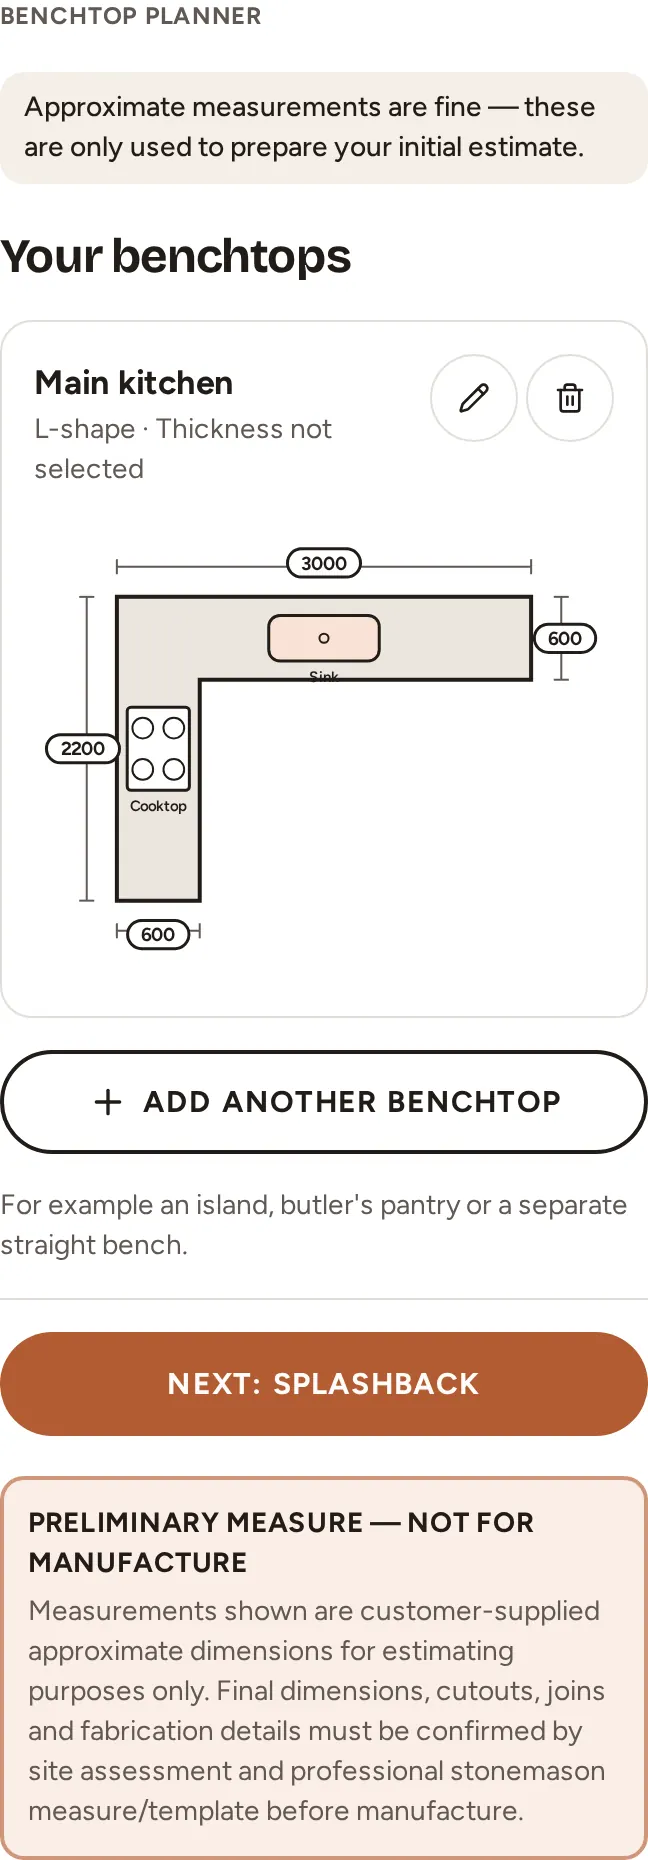
Screens from the actual Benchtop Planner using an example kitchen. Scroll inside each screen to see more.
Your Planner drawing is a preliminary measure
It helps us understand your layout, approximate dimensions, sink and cooktop position and the general size of the project. It is not a fabrication drawing, a final template or a manufacturing instruction. Final dimensions are confirmed by us or our stonemason before manufacture.
Don't worry about…
- Being a few millimetres out
- Working out square metres
- Working out slab sizes
- Calculating joins
- Exact sink cut-out dimensions
- Exact cooktop cut-out dimensions
- Producing a professional drawing
- Having your final colour selected
- Having every product selected
We just need enough information to understand your project and prepare an initial estimate.
For an initial estimate
- A few photos of the kitchen
- Rough benchtop measurements
- Approximate sink location
- Approximate cooktop location
- Splashback measurements if applicable
- Your contact details
That's usually enough to get started.
Measuring questions
Do my measurements need to be exact?
No. They are used for the initial estimate. Final dimensions are confirmed by us or our stonemason before manufacture.
What unit should I measure in?
Millimetres are preferred. If you only have centimetres or metres, that's fine — just tell us which unit you used.
Do I need to measure the sink cut-out?
No. For the initial estimate, show us approximately where the sink is and include a photo.
Do I need to measure my cooktop cut-out?
No. For the initial estimate, approximate location and a photo are enough. Final appliance details must be confirmed before manufacture where a cut-out is required.
How do I measure a splashback?
Measure the approximate width and height of each section and include photos.
What if my kitchen is an unusual shape?
Take photos, make a rough sketch and provide approximate dimensions. We can assess it from there.
Can I just send photos?
Photos are very useful, but rough measurements usually help us prepare a better initial estimate.
Can you come and measure it?
If you can't measure, or would rather we look in person, you can request an On-Site Assessment when you start your estimate. Tell us about the kitchen and we'll contact you to arrange a time. Once you go ahead, final dimensions are measured and confirmed by us or our stonemason before manufacture.
Got your measurements? You're ready.
Send us your photos and rough measurements and we'll take it from there.
Your measurements are for estimating only. Final dimensions are confirmed by us or our stonemason before manufacture.